I Guess I Have Found The Easiest WayTo Add Facebook Messenger Plugin To Blogger
Thinking of adding a cool messenger messaging option to your blog or website? Adding a messenger button to your blog or website to make it easy for your readers to interact with you on a real-time basis. Facebook Messager Plugin comes with a lightweight and completely non-intrusive interface. It appears as an icon at the bottom of your website. Users can simply click on the icon at the bottom of your blog to interact with you. So, here is a guide, to "how to add Facebook messenger plugin to blogger."
Over the years, Facebook has transformed into one of the most popularly used social networking site across the world. Others social networking sites are nowhere near Facebook's popularity. Facebook has got huge userbase of 21.1 billion monthly users and this signifies facebook can be fragile for both businessman and bloggers.
Also Read: HOW TO ADD A CONTACT FORM TO YOUR BLOGGER BLOG
If you have not yet created a Facebook page for your business or your blog. I insist you create one. As a business Facebook fan page can help you in increasing your product sales. For bloggers, it can generate massive traffic for your blog.
Read More: How To Add JQuery Lazy Load Plugin to Blogger
The best thing about Facebook messenger plugin is its charming and floating interface. Thus, it doesn't occupy any space on your blog. You can also show your Facebook fan page like the button to enable visitors to like your page when they try to contact you.
Read More: HOW TO GET FREE BLOG IMAGES WITHOUT GETTING COPYRIGHT
Whenever a user sends a message through the Facebook messenger plugin on your websites, the message will go directly to your Facebook page inbox. You can reply them to your Facebook page inbox and also start communicating with them directly.
Procedure to "add Facebook messenger plugin to blogger"
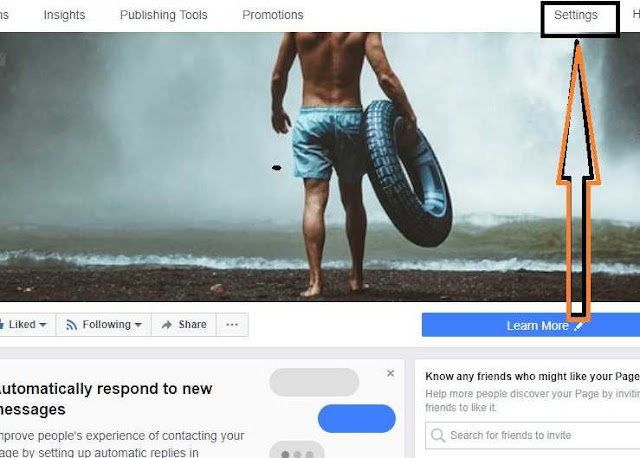
1. Got to your Facebook page and then setting.
If you do not have a Facebook page. Go to Facebook and create one before getting into the tutorial.
2. Scroll down and click on messenger platform.
Also Read: HOW TO INSERT CODEBOX IN BLOGGER POST
3. Now scroll down and Go to Whitelist domains. Add your domain here including HTTP/HTTPS and click save.
4. Now scroll down a lit bit more until you reach customer chat plugin. Now click on setup.
5. Now add-website domain name and click on save. Copy the code from the code box.
6. Now go to your blogger dashboard and then theme. Now click on Edit Html and find </body>. Paste the code copied from the above step right above the closing body tag i.e </body>.
7. Click on save template option.
Read More: How to add a download button in blogger post without coding
Now, you are all done with how to add Facebook messenger plugin to blogger. You can now interact with your users on a real-time basis.


the instruction and the image are not matched, above "/head>" or above "/body>"?
ReplyDelete